


Bikepacking in the forest, hills and trails doesn’t have to stop in winter. You just might have to put a wee bit more thought into how you go about it. We’re not talking about The Iditarod or a Greenland Traverse here, just an extension of our bikepacking into the cold, snowy, dark months. I hope that this short piece will inspire some of you to give it a try...
Planning & Preparation
Study the weather and possibly even the avalanche forecast before heading out. Clear, windless and -7 o C will be a far more pleasant night out than cloud, 15-20 mph wind and + 6 o C! At the time of me writing this there is a High avalanche risk in the Cairngorms National Park with threats at altitudes as low as 500m. Choose a modest trail and campsite that you might have used already in spring, summer or autumn, eg. 7 miles on backroads and tracks with 500ft of ascent, that will help reduce the unknowns to the winter part for a first trip. Consider setting off from home after dinner, this means you need to ride with less food and fuel, maybe replace it with a small treat such as a hip flask of malt whisky. Layer up and slow down so that you don’t get sweaty as that can literally be a killer if things go wrong. Let someone at home know where you are heading and have a plan in place in case something goes wrong. First time out, keep it simple.
If you are already in the habit of hiking, camping and bikepacking in the other seasons you will most likely have all the clothing that you need for a winter bikepacking trip. Lots of gloves and lots of layers tends to be my mantra. Here in Scotland down only works well as an insulation in cold and dry conditions that is why most of the time I use synthetic insulation as it still works when wet. Check that you can easily control your bike, adjust or take your layers off whilst still wearing big, warm ski gloves! Extend zip pull loops for example. Ask yourself the question ‘Will I be warm and comfortable enough if I have to push my bike?’ That should help you decide what clothing to take. In winter I prefer to ride in my Vibram soled mountain boots on flat pedals. That way I do not get such cold feet and can walk about in the snow a lot better than most riding shoes.
Keep the bikepacking kit simple too. Take a daypack as well as frame, bar and seatpost bags. If you have bottle bosses on frame and forks stick on extra cages. Pack everything in dry bags but don’t make them too tight, they go in bike luggage easier if there is a bit of ‘squish’ to play with. Be protective of your sleep kit to the point of being obsessive. My sleeping bag and merino sleeping clothes go in my bar bag and stay in there until everything else is set up first. Extra gloves and insulated jackets can be stowed in your daypack for fast access whilst still on the saddle of your bike, all you need to do is stop. I have really got to like the plates and cages that can be fitted to my bike. Here I strap my shelter, my cooking set and coffee press. In winter avoid cramming kit into bags, leave room to work with big gloves as stuff never goes back in as in my experience neatly after being packed the first time at home.
Finally, keep your bike set up nice and simple too. I use a dynamo light but if you are using batteries remember the cold will make them run down faster. Bring a head torch too as part of your emergency kit. A X1 transmission means that there is no front derailleur to freeze once packed with snow. Watch out for gear cable and if you have them brake cables getting sticky, then frozen with obvious consequences. I run 29 inch tires which are 2.6 inches in width. These are doing fine for me right now in the Scottish winter. No doubt a Fat Bike would make winter riding more efficient but for some folks another bike is not an option to just learn to go with what you have and you guessed… keep it simple!
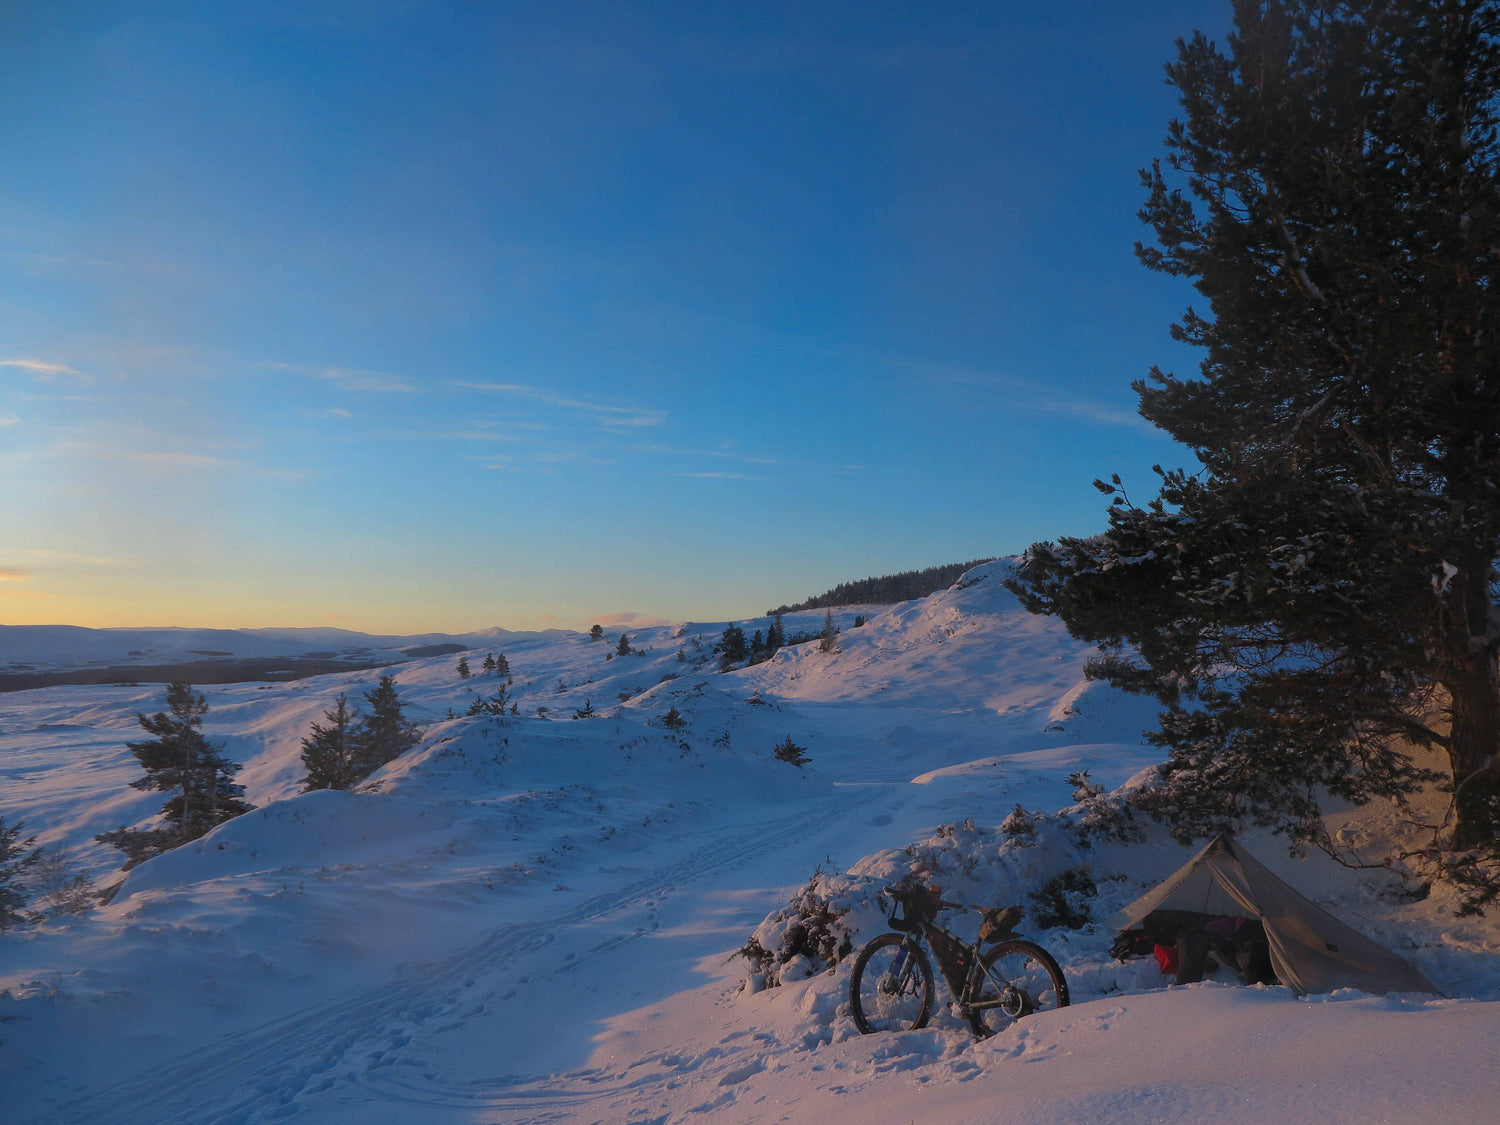
Camping
Once the shelter is pitched and you are inside with all your gear get the stove on and boil up a litre of water for your Nalgene hot water bottle. Stick it into your sleeping bag to pre-warm it and then look forward to toasty feet all night and guaranteed unfrozen water for morning coffee. Steam and condensation are our enemy and even more so in winter. Venting your shelter can help reduce condensation but best be prepared for it and sponge it down with a small cloth brought for this purpose. In the morning watch out for ice on the inside of your shelter and don’t knock it down onto you.
I like to have a warm drink before bed, something like fruit tea, or soup is good. This also helps keep you warm before sleep. Whilst organising kit, cooking and looking at maps I find a head torch too strong, so whenever I can use a 2 metre length of LED fairy lights for a more subdued effect as a treat. Winter camping usually means a lot of time in the tent. Bring a book. Write, Listen to where you are . Look out at where you are if it is clear. Take photographs of the night sky. Whatever you do be sure to engage with where you have stopped as these are special times.
When the time finally comes to go to sleep be bothered to change into your lovely warm and dry merino baselayer. Take any damp clothes, batteries and gas canister if using one into your sleeping bag to protect them from the cold.
In the morning
Enjoy the dawnlight and your freshly brewed coffee. I usually soak oats, dried fruit, chocolate chips and anything else I fancy in an old hydration pack with the lid sliced off. Sometimes I heat it in the pan as most of them are heat proof and sometimes I just eat away at it cold. Do as much of your packing as possible whilst in your shelter. This is good practice for when you have to because of bad weather and it avoids getting snow into your drybags or stuff blowing away.
Check around your site before you go and don’t forget ‘Leave No Trace’.
Photos and words by Jim Sutherland.
Leave a comment
This site is protected by hCaptcha and the hCaptcha Privacy Policy and Terms of Service apply.